Delicious Peanut Clusters Recipe: Easy Chocolate – Covered Peanuts
Craving a sweet and salty treat? Your kitchen is about to become the ultimate spot for chocolate peanut clusters. Imagine turning ordinary peanuts into a gourmet snack, all with minimal effort and maximum flavor.
Making easy peanut clusters is easier than you think. With just a few ingredients and basic kitchen skills, you can make a treat that rivals store-bought ones. These chocolate-covered peanuts are perfect for a quick dessert, a party snack, or a thoughtful gift.
Table of Contents
Key Takeaways
- Discover an incredibly simple chocolate peanut clusters recipe
- Learn professional-level chocolate coating techniques
- Create gourmet treats in under 30 minutes
- Customize with different chocolate and nut variations
- Perfect for gifts, parties, or personal indulgence
Understanding the Perfect Chocolate-Peanut Combination
Making delicious homemade peanut clusters is more than just mixing ingredients. It’s about understanding the amazing flavor mix between chocolate and peanuts. This mix makes these treats so tempting.
The sweet and salty mix in chocolate peanut clusters is amazing. Peanuts add a rich, nutty taste. Chocolate brings smooth sweetness, making a perfect balance.
The Science Behind Sweet and Salty Flavors
Our taste buds react differently to sweet and salty flavors. When mixed, they create a complex taste experience. This is why chocolate peanut clusters are so addictive.
- Sweet chocolate activates reward receptors
- Salty peanuts enhance overall flavor complexity
- Contrasting textures create satisfying mouthfeel
Benefits of Homemade vs. Store-Bought
Homemade peanut clusters have big advantages over store-bought ones. You can choose the ingredients, customize flavors, and make them healthier.
| Aspect | Homemade Clusters | Store-Bought Clusters |
|---|---|---|
| Ingredient Control | Complete customization | Limited options |
| Sugar Content | Adjustable | Fixed recipe |
| Freshness | Maximum freshness | Potentially stale |
By making your own chocolate peanut clusters, you can try different chocolates and sweetness levels. You can make a treat that’s all your own, better than any store-bought one.
Essential Ingredients for Chocolate-Covered Peanuts
Making the best peanut clusters starts with picking top-notch ingredients. The quality of your simple peanut clusters depends on what you choose. Let’s look at the main parts that make these treats so tasty.
Choosing the Right Chocolate
Chocolate is the main attraction in your simple peanut clusters. Here are some chocolate choices:
- Dark Chocolate: Rich and intense flavor
- Milk Chocolate: Creamy and sweet profile
- White Chocolate: Smooth and delicate taste
Selecting Quality Peanuts
The base of great peanut clusters is premium nuts. You have these options:
- Roasted peanuts (salted or unsalted)
- Raw peanuts with natural flavor
- Dry-roasted peanuts for extra crunch
Additional Ingredients and Tools
To make your best peanut clusters even better, consider these extras:
- Coconut oil (for smoother chocolate melting)
- Sea salt for garnishing
- Optional flavor enhancers like vanilla extract
With these ingredients, you’re all set to make delicious simple peanut clusters. They’ll surely wow your friends and family.
Kitchen Equipment You’ll Need
To make tasty classic peanut clusters, you only need a few basic tools. Having the right equipment makes your quick peanut clusters recipe a breeze. Let’s look at the must-haves for these yummy treats.
- Microwave-safe bowl: Great for melting chocolate smoothly and evenly
- Baking sheet: Offers a flat area for setting your clusters
- Parchment paper: Stops sticking and makes cleaning easy
- Spatula or spoon: Useful for mixing and covering peanuts with chocolate
- Measuring cups and spoons: Crucial for accurate ingredient amounts
If you’re missing something, don’t fret. Many tools can be swapped out. A glass bowl is fine for melting chocolate if you lack a microwave-safe one. Wax paper can also substitute for parchment paper when needed.
For those without a microwave, a double boiler or slow cooker works well for melting chocolate. The goal is to keep the heat gentle and even. This ensures your classic peanut clusters are smooth and shiny.
Pro tip: Always have your equipment ready before starting your quick peanut clusters recipe to ensure a smooth cooking process.
With just your basic kitchen setup, you can whip up these tasty chocolate-covered treats. These simple tools will help you make peanut clusters that look like they came from a pro!
Preparing Your Workspace and Ingredients
Making delicious peanut clusters is more than just using great ingredients. It’s also about setting up your workspace right. A well-prepared kitchen is key to making your chocolate treats look and taste amazing.
Start by collecting all your ingredients and tools. A tidy workspace helps you prepare smoothly and keeps you calm while cooking.
Creating an Efficient Melting Station
Organize your melting station carefully. Make sure everything is within reach to make your peanut clusters recipe easy and fun.
- Line baking sheets with parchment paper
- Measure all ingredients beforehand
- Arrange tools in order of use
- Have cooling racks ready
Material Organization for Maximum Efficiency
Being organized is crucial when making easy peanut clusters. Follow this guide to make your chocolate-making process smoother:
| Ingredient | Quantity | Preparation Step |
|---|---|---|
| Honey Roasted Peanuts | 34.5 ounces | Measure and set aside |
| Almond Bark | 32 ounces | Chop into small pieces |
| Chocolate Chips | 12 ounces | Separate and ready |
| German Chocolate Bar | 4 ounces | Break into melting-friendly chunks |
By setting up your workspace carefully, you’ll turn making peanut clusters into a fun cooking experience. Mise en place – having everything ready – is your secret to success.
The Best Chocolate Melting Techniques
Creating perfect chocolate peanut clusters starts with mastering chocolate melting techniques. Your success depends on choosing the right method and understanding how to prevent common chocolate mishaps.
There are three main methods for melting chocolate for your homemade peanut clusters:
- Double Boiler Method: The most controlled technique for melting chocolate
- Microwave Melting: Quick and convenient for home cooks
- Instant Pot Technique: A modern approach to chocolate preparation
When melting chocolate for chocolate peanut clusters, temperature control is crucial. Use 15 ounces of chocolate melting wafers. Adding 1 teaspoon of neutral oil helps achieve smooth consistency. Lightly salted roasted peanuts work best for deeper flavor.
Pro tips for perfect chocolate melting include:
- Keep temperatures below 88°F to prevent chocolate seizing
- Stir continuously during melting
- Use medium-low heat
- Avoid water contact with melting chocolate
Room temperatures above 68°F can affect chocolate hardening. So, work in a cool environment when creating your homemade peanut clusters. A medium cookie scoop helps portion consistent clusters.
Patience and gentle heat are the secrets to smooth, glossy chocolate every time!
Remember that different chocolate types melt differently. Vegan chocolate chips, typically sold in 10-ounce bags, might require slightly adjusted melting techniques compared to traditional chocolate.
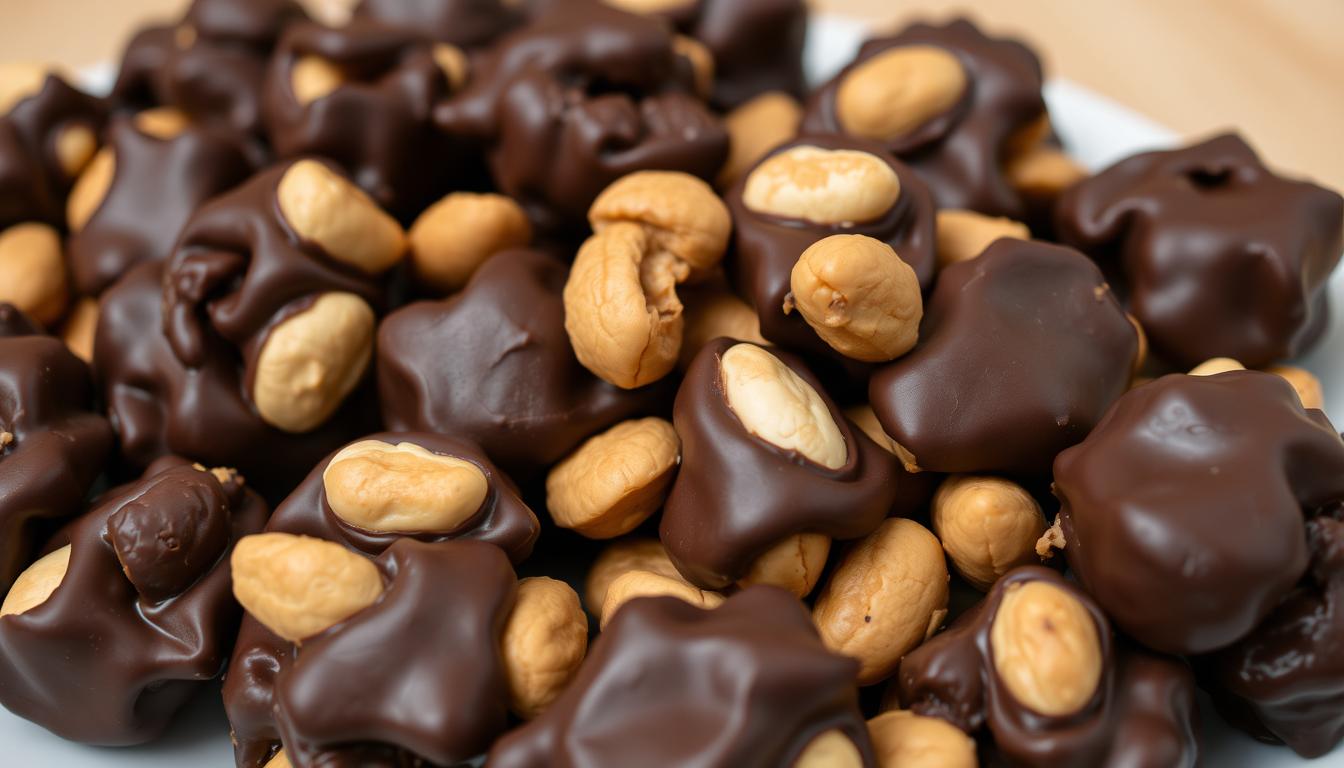
Basic Peanut Clusters Recipe
Making the best peanut clusters at home is simple. These treats mix rich chocolate with crunchy peanuts. They offer a sweet and crunchy mix.

First, get your ingredients ready. You need just two main things for these tasty clusters:
- 32 ounces of salted, dry roasted peanuts
- 1¼ cups of dark chocolate chips
Step-by-Step Coating Process
The secret to making these clusters is in the melting and mixing. Follow these steps to make your perfect batch:
- Melt the chocolate chips in a crockpot or double boiler
- Stir peanuts into the melted chocolate well
- Use an OXO cookie scoop for even clusters
- Drop spoonfuls onto a silicone baking mat
Tips for Perfect Clusters
To get perfect clusters, remember these tips:
- Keep a 1:2 chocolate-to-peanut ratio
- Stir the mix every 15 minutes while cooking
- Let clusters set in the fridge for 30-60 minutes
- Optional: Sprinkle sea salt or nonpareils for extra taste
Your homemade clusters will make about 82 servings. Each cluster has about 274 calories. Store them in an airtight container at room temperature for up to 5 days or refrigerate for two weeks.
Proper Cooling and Setting Methods
Making perfect classic peanut clusters needs careful cooling and setting. After making your quick peanut clusters recipe, make sure they have the right texture and look.
The chocolate peanut clusters need 1-2 hours to set at room temperature. Here are some tips for the best results:
- Room Temperature Setting
- Preserves chocolate’s natural shine
- Allows gradual, even cooling
- Takes approximately 1-2 hours
- Refrigeration Method
- Speeds up setting process
- May cause chocolate to develop a slightly cloudy appearance
- Reduces setting time to approximately 30-45 minutes
To see if your classic peanut clusters are set, check for a firm, glossy look. Gently touch the surface – it should feel solid and not sticky. If the chocolate leaves a mark, let them cool longer.
Pro tip: For the best results, place your peanut clusters on parchment paper or a silicone mat. This prevents sticking and makes removal easier. Space them about 2 inches apart to ensure even cooling and prevent them from touching.
Creative Variations and Flavor Enhancements
Turning your basic peanut clusters recipe into something special is easy. Homemade peanut clusters are super versatile. You can try out different flavors and textures that will make your taste buds happy.
It’s simple to make your peanut clusters recipe better. Just add a few things, and you’ll have treats that are as good as store-bought ones.
Exciting Topping Ideas
- Sprinkle flaky sea salt for a sweet-savory contrast
- Crush peppermint candies for a festive touch
- Add colorful rainbow sprinkles for fun
- Drizzle white chocolate for visual appeal
Mixed Nut Variations
Make your homemade peanut clusters even more exciting by mixing in different nuts. Here are some great combinations:
| Nut Combination | Flavor Profile | Best Chocolate Pairing |
|---|---|---|
| Peanuts + Almonds | Nutty and Complex | Dark Chocolate |
| Peanuts + Cashews | Creamy and Rich | Milk Chocolate |
| Peanuts + Pecans | Sweet and Buttery | Semi-Sweet Chocolate |
Additional Flavor Enhancements
Feel free to get creative with your peanut clusters recipe. Adding dried fruits like cranberries or apricots can surprise you with new flavors. A little cinnamon or cayenne can turn your clusters into a fancy treat.
Remember, the best peanut clusters are the ones that reflect your personal taste!
Storage Tips and Shelf Life

Keeping your homemade chocolate peanut clusters fresh is key. The right storage can help them stay delicious for longer.
There are different ways to store your chocolate peanut clusters, depending on how long you want them to last:
- Room Temperature: Store in an airtight container for up to 1 week
- Refrigerator: Extends shelf life to approximately 2 weeks
- Freezer: Preserves clusters for up to 2 months
Here are some important tips for storing chocolate peanut clusters:
- Use containers with tight-fitting lids to prevent moisture
- Place wax paper between cluster layers to prevent sticking
- Keep away from direct sunlight and heat sources
Temperature changes can cause chocolate bloom, which looks like a whitish film. To avoid this, keep your clusters in a cool, consistent place between 60-70°F.
To keep them fresh, wrap each cluster in parchment paper before storing. This helps keep their texture and prevents flavors from mixing.
Gifting and Packaging Ideas
Turning your homemade simple peanut clusters into gifts is an art. It’s about mixing creativity with a personal touch. The right packaging can make these treats more than just a snack. It turns them into a thoughtful gift that brings joy to the receiver.
When making easy peanut clusters as gifts, think about these packaging ideas. They’ll make your treats shine:
- Clear cellophane bags with festive ribbons
- Decorative mason jars with custom labels
- Vintage tins with seasonal designs
- Small gift boxes with personalized wrapping
Holiday Presentation Suggestions
Simple peanut clusters can become amazing holiday gifts with the right presentation. Each holiday needs its own special packaging:
| Holiday | Packaging Idea |
|---|---|
| Christmas | Red and green cellophane with candy cane accents |
| Valentine’s Day | Heart-shaped boxes with romantic ribbons |
| Halloween | Orange and black themed treat bags |
Decorative Container Options
Your choice of container can really make your easy peanut clusters stand out. Presentation is as important as taste. Choose transparent containers to show off the treats, or go for rustic to add a homemade charm.
The best gifts are made with love and packaged with creativity!
When giving your simple peanut clusters, add a small label with ingredients and a personal note. This makes the gift even more special. It turns a tasty treat into a heartfelt present that friends and family will love.
Troubleshooting Common Issues
Making perfect chocolate peanut clusters can be tricky. Knowing common problems helps you make great treats every time.
Chocolate Melting Problems
Chocolate seizing is a big issue when making clusters. It happens when moisture gets into the chocolate, making it grainy. To avoid this:
- Use completely dry utensils
- Avoid water near your melting station
- Melt chocolate at low, consistent temperatures
Setting and Texture Issues
Getting the right texture is key for perfect clusters. If they’re not setting right, try these tips:
- Ensure chocolate is tempered correctly
- Cool clusters at room temperature or refrigerate
- Use high-quality chocolate with proper cocoa butter content
Preventing Chocolate Bloom
Chocolate bloom is a white, chalky layer on clusters. To prevent this common issue, follow these guidelines:
- Store clusters in cool, dry environments
- Avoid temperature fluctuations
- Use fresh, high-quality chocolate
| Issue | Cause | Solution |
|---|---|---|
| Chocolate Seizing | Moisture contact | Use dry tools, avoid water |
| Poor Setting | Incorrect tempering | Control temperature, use quality chocolate |
| Chocolate Bloom | Temperature variations | Store in consistent environment |
With these tips, you’ll be able to make delicious chocolate peanut clusters that look and taste amazing.
Conclusion
Making your own quick peanut clusters recipe is more than just cooking. It’s a chance to create tasty homemade treats. With just a few simple steps and ingredients, you can turn regular peanuts into amazing chocolate-covered snacks.
The classic peanut clusters recipe is very flexible. You can make them for any occasion, like a family event or a holiday gift. You can also try different types of chocolate, like semi-sweet or milk chocolate, to add your own twist.
Your homemade chocolate peanut clusters can stay fresh for up to two weeks at room temperature or a month in the fridge. Remember, it takes practice to get it right. Each try will help you get better and make clusters that everyone will love.
We invite you to be your own chocolatier. Try new things and enjoy the fruits of your labor. Your adventure in making delicious chocolate peanut clusters begins today!
FAQ
How long do homemade peanut clusters last?
Can I use different types of chocolate for my peanut clusters?
Are peanut clusters gluten-free?
Can I make peanut clusters without a double boiler?
How can I prevent my chocolate from becoming grainy?
What nuts can I substitute for peanuts?
How do I package peanut clusters as gifts?
Can I make sugar-free peanut clusters?
What’s the best way to cool and set peanut clusters?
How do I prevent chocolate bloom on my peanut clusters?
Leave a review :
There are no reviews yet. Be the first one to write one.