Delicious Peanut Clusters: Step-by-Step Guide to Chocolate-Covered Peanuts
The first time I made homemade peanut clusters, my kitchen became a place of sweet dreams. It’s amazing to make these treats by hand. They turn simple ingredients into a delicious masterpiece that brings families together.
Making perfect peanut clusters is more than a recipe. It’s an art that needs precision, passion, and creativity. This easy recipe will help you make these treats, no matter if you’re new to cooking or experienced.
Imagine giving these treats to your loved ones. The chocolate and peanuts together are a joy to share. This guide will teach you how to make chocolate-covered peanuts that are as good as store-bought ones.
Table of Contents
Key Takeaways
- Master the art of creating professional-quality peanut clusters at home
- Learn essential techniques for chocolate tempering and coating
- Understand the importance of ingredient selection and preparation
- Discover tips for achieving the perfect chocolate texture
- Explore creative variations of classic peanut clusters
Understanding Alexander’s Signature Chocolate Recipe
Explore the world of artisanal chocolate-making with a legendary recipe. It turns simple ingredients into amazing chocolate covered peanut clusters. The story behind these treats is as fascinating as their taste.
The Origins of Miller House Chocolate Making
Edwin Alexander learned chocolate-making on an incredible journey. He studied from an American chocolatier who learned from skilled Mexican women. With $1,200 and two weeks of lessons, Alexander started a business that changed chocolate forever.
The Secret Behind the Perfect Texture
Making great Christmas peanut clusters is more than just ingredients. The secret is a unique process from San Miguel de Allende, Mexico. It involves:
- Precise temperature control
- High-quality local ingredients
- Traditional slow-melting methods
- Carefully selected peanuts
Why This Recipe Stands Out
Alexander’s chocolate covered peanut clusters are special because of their authenticity and quality. Each cluster is a story of cultural heritage, blending Mexican techniques with American innovation. It’s a treat that’s not just sweet, but an experience of craftsmanship and flavor.
“Great chocolate is an art form passed down through generations” – Edwin Alexander
Whether for Christmas or any time of the year, this recipe is a perfect mix of tradition and taste.
Essential Ingredients for Perfect Peanut Clusters
Making delicious no-bake peanut clusters needs the right ingredients. These ingredients make your treat go from good to great. The secret is in choosing top-notch parts that blend well together.
Your must-have list includes:
- High-quality chocolate: 16 oz of white chocolate and 12 oz of semi-sweet chocolate
- Roasted and salted Spanish peanuts: 1.5 lb (24 oz)
- Optional flavor enhancers: vanilla extract, sea salt
Choose fresh, crunchy peanuts for your clusters. The right peanuts make your clusters irresistible.
It’s important to think about nutrition when making these treats. Each cluster has:
- Calories: 167 kcal
- Protein: 8 g
- Total fat: 20 g
- Carbohydrates: 15 g
If you want a vegan option, use vegan chocolate chips. Mix 10 ounces of vegan chocolate chips with 1 teaspoon of coconut oil. This way, everyone can enjoy crunchy peanut clusters.
Pro tip: Always use fresh ingredients to ensure the best possible flavor and texture in your homemade peanut clusters.
Required Equipment and Tools
Making delicious peanut cluster dessert needs the right kitchen tools. The right tools make chocolate-making fun and easy.
Essential Kitchen Equipment
For your peanut cluster candies, you’ll need a few key tools. Here’s what you must have:
- Double boiler for smooth chocolate melting
- Candy thermometer for precise temperature control
- Silicone molds or parchment-lined baking sheet
- Mixing bowls of various sizes
- Spatulas and whisks
Temperature Control Tools
Getting the temperature right is key for perfect peanut cluster dessert. Here are the tools you need:
| Tool | Purpose | Temperature Range |
|---|---|---|
| Digital Candy Thermometer | Precise chocolate melting | 90-115°F |
| Infrared Thermometer | Quick surface temperature reading | 32-600°F |
| Instant-Read Thermometer | Checking ingredient temperatures | -40-450°F |
Proper Storage Containers
After making your peanut cluster candies, storing them right is important. Choose containers that keep them fresh by protecting from moisture and temperature changes.
- Airtight glass containers for room temperature storage
- Freezer-safe plastic containers for long-term preservation
- Wax paper or parchment paper for layer separation
With these tools, you’re ready to make tasty peanut cluster candies like a pro.
Preparing Your Workspace and Ingredients

Making delicious homemade peanut clusters needs careful planning. Before starting your easy peanut clusters recipe, make sure your workspace is clean and ready. This will make cooking more fun and efficient.
Begin by clearing a big area in your kitchen. You’ll need enough space to lay out your ingredients and work comfortably. Get all your tools and ingredients ready before starting your homemade peanut clusters journey.
Essential Workspace Preparation
- Clean and disinfect your work surface thoroughly
- Line your countertop with parchment paper for easy cleanup
- Arrange ingredients in order of use
- Measure out all ingredients precisely
When getting your ingredients ready for your easy peanut clusters recipe, focus on quality and prep. Make sure your peanuts are:
- At room temperature
- Free from moisture
- Evenly sized for consistent clusters
Pro tip: If using chocolate bars, chop them into small, uniform pieces to help them melt evenly and create smooth, delectable homemade peanut clusters.
Ingredient Checklist
- 1 pound dry roasted peanuts
- 1 pound candy melts or almond bark
- 12 ounces chocolate chips
- 4 ounces Baker’s chocolate
By following these steps, you’ll be ready to make perfect, tasty peanut clusters. They’ll surely impress your family and friends.
The Art of Melting Chocolate
Making perfect chocolate covered peanut clusters starts with melting chocolate right. You need to know the best ways and avoid mistakes that can mess up your treat.
Mastering the Double Boiler Technique
The double boiler method is key for smooth, glossy chocolate. It keeps the chocolate away from direct heat, making it silky-smooth for your clusters.
- Use a heat-safe glass or metal bowl
- Fill bottom pot with 1-2 inches of water
- Ensure water doesn’t touch the top bowl
- Heat water to a gentle simmer
Temperature Control Secrets
Getting the temperature just right is crucial for great chocolate covered peanut clusters. Your candy thermometer is your best friend here.
- Ideal melting temperature: 110°F-120°F
- Never exceed 140°F
- Stir chocolate gently and consistently
- Watch for smooth, glossy texture
Avoiding Chocolate Melting Mistakes
Stay away from common mistakes that can ruin your clusters. Water is chocolate’s biggest enemy – just one drop can make it grainy.
- Keep all utensils completely dry
- Use low, steady heat
- Remove from heat when most chocolate is melted
- Continue stirring off the heat to complete melting
By using these expert tips, you’ll make chocolate covered peanut clusters that are smooth, glossy, and irresistible.
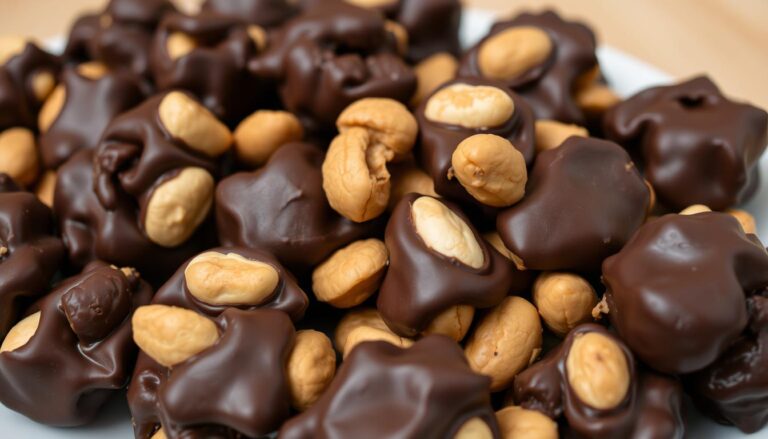
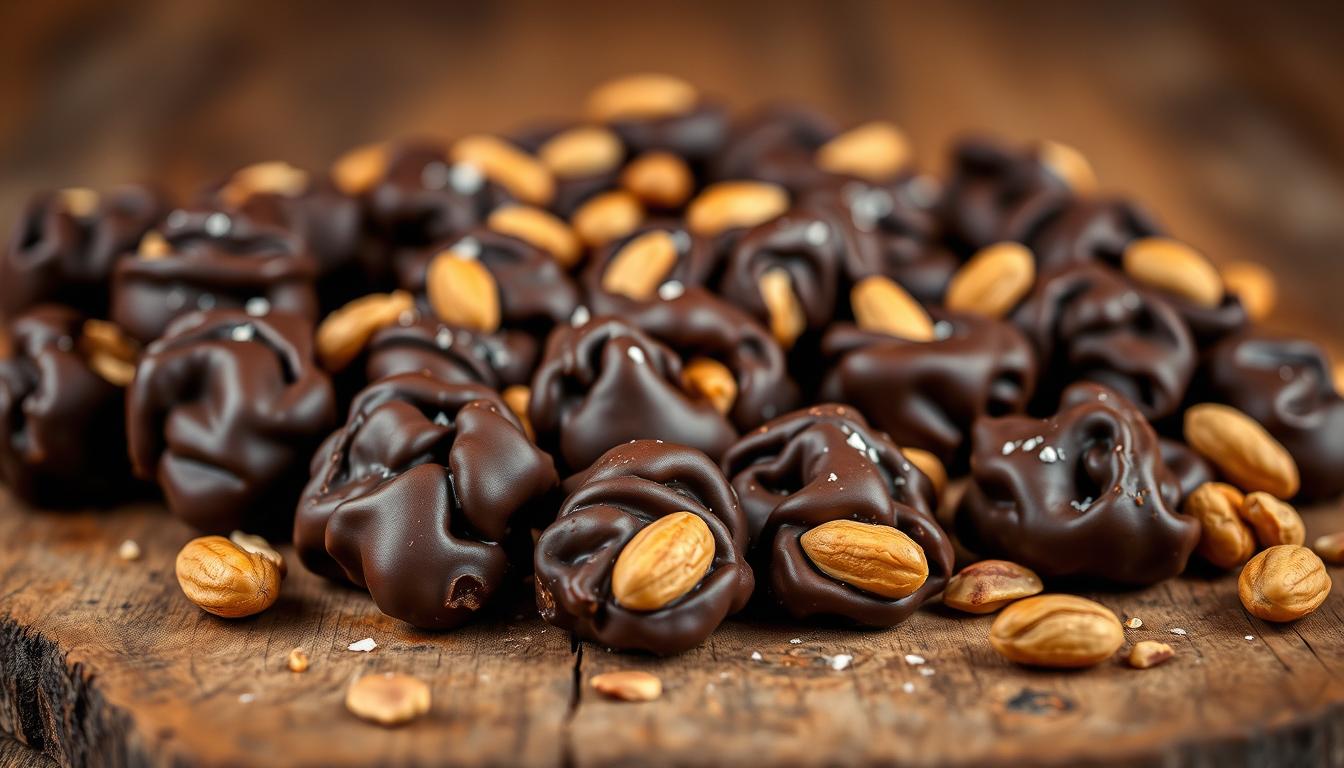
Creating Perfect Peanut Clusters
Making delicious no-bake peanut clusters is all about precision and creativity. It turns simple ingredients into tasty treats that will make your taste buds happy and impress your friends.
To start making your peanut clusters, get your ingredients ready and follow these key steps:
- Select high-quality Spanish peanuts (2-3 cups recommended)
- Ensure your chocolate is smoothly melted
- Prepare a clean workspace with a silicone baking mat or parchment paper
When mixing peanuts with melted chocolate, fold gently. This ensures each nut is well-coated. Your goal is to make rustic, tasty no-bake peanut clusters that look good and taste amazing.
Here are some tips for making perfect peanut clusters:
- Use an OXO cookie scoop for uniform cluster sizes
- Leave space between clusters to prevent sticking
- Consider adding a sprinkle of flaked sea salt for enhanced flavor
Your peanut clusters need about 1 hour to chill and set. Each cluster should be about 1/4 cup or 2 tablespoons in size. This makes around 30 delightful servings.
When storing your homemade peanut clusters, remember they can stay fresh:
- Room temperature: up to 1 month
- Refrigerator: up to 3 months
- Freezer: up to 6 months
Temperature and Setting Guidelines
Making the perfect easy peanut clusters recipe needs focus on temperature and setting. Your Christmas peanut clusters will look great if you learn how to cool and store them right.
Optimal Cooling Methods
Cooling is key for the right cluster texture. Here’s how to cool your peanut clusters:
- Let clusters cool at room temperature for 15-20 minutes
- Stop chocolate bloom by avoiding sudden temperature changes
- Keep them in a cool, dry spot away from sunlight
Freezing Techniques
Freezing is great for quick setting of your easy peanut clusters recipe. Here’s a quick freezing guide:
- Put clusters on a parchment-lined baking sheet
- Freeze for 20-30 minutes until set
- Put them in an airtight container for storage
Storage Temperature Requirements
Storing your Christmas peanut clusters right is important. Here’s a storage guide:
| Storage Location | Duration | Temperature |
|---|---|---|
| Refrigerator | Up to 2 weeks | 32-40°F |
| Freezer | Up to 3 months | 0°F or below |
| Room Temperature | 1 week | 68-72°F |
Pro tip: Always use an airtight container to keep moisture out and the clusters crisp. Your treats will stay fresh and tasty when stored right!
Storage and Preservation Methods

Keeping your homemade peanut cluster candies fresh is key. The right storage keeps them tasting great and feeling just right. This way, you can enjoy them for a long time.
Here are the main steps to store your peanut cluster candies:
- Use airtight containers to keep out moisture and air
- Layer them with parchment paper to stop sticking
- Keep them in a cool, dry spot, away from sunlight
- Keep the temperature steady to keep the chocolate perfect
Temperature is very important for keeping your peanut clusters fresh. Different places can affect how long they last:
| Storage Location | Temperature Range | Expected Shelf Life |
|---|---|---|
| Countertop | 60-70°F | 5-7 days |
| Refrigerator | 35-40°F | 2 weeks |
| Freezer | 0-32°F | 3 months |
Freezing is the best way to keep your peanut clusters for a long time. Wrap each cluster in wax paper before freezing in a safe container. To thaw, do it in the fridge. This keeps them from getting soggy and keeps the chocolate perfect.
By storing your peanut clusters right, they’ll stay fresh and tasty. You can enjoy them whenever you want.
Troubleshooting Common Issues
Making the perfect peanut cluster dessert can be tough, even for pros. Knowing the common problems helps you make chocolate covered peanut clusters with ease.
Here are some common issues and how to fix them. These tips will help your chocolate covered peanut clusters be smooth and look like they were made by a pro:
- Chocolate Consistency Problems
- If chocolate is too thick, add a bit of neutral oil like coconut oil to thin it
- Keep the chocolate at the right melting temperature to avoid seizing or burning
- Setting and Texture Challenges
- Clusters not setting right might mean the chocolate was too hot
- Use a candy thermometer to check the exact temperature
- If setting fails, start over with fresh chocolate
- Chocolate Appearance Concerns
- A white, chalky surface (chocolate bloom) means the temperature changed too much
- Temper the chocolate right to avoid bloom
- Keep clusters in a cool, steady place
Professional tip: Keeping the temperature just right is key for chocolate covered peanut clusters. Get a good thermometer to get consistent results.
Remember, practice makes perfect – don’t get discouraged by initial challenges!
Knowing these common issues will help you make amazing peanut cluster desserts. They’ll impress your family and friends.
Conclusion
Making peanut clusters is an art that needs both skill and creativity. Your journey in chocolate making has helped you get better at these tasty treats. You’ve learned how to melt chocolate and make chocolate covered peanut clusters, turning simple ingredients into gourmet goodies.
Every batch of peanut clusters is a chance to learn. With practice, you’ll get better at coating chocolate, controlling temperatures, and mixing flavors. Making clusters of two tablespoons helps keep them consistent. You can also try different chocolates or add rice crispy cereal to make them even better.
Now you know how to store these chocolate covered peanut clusters right. They stay fresh for two weeks at room temperature. In the fridge, they last a month. And in the freezer, they can last up to three months. Enjoy the journey and the tasty results of your chocolate-making adventure.
Remember, each cluster has about 180 calories. They have 13g of fat, 15g of carbs, and 4g of protein. Your homemade treats are not only tasty but also a mindful treat when made with love and care.
FAQ
How long can I store homemade chocolate-covered peanut clusters?
What type of chocolate works best for making peanut clusters?
Can I add other nuts to the recipe?
What causes chocolate bloom, and how can I prevent it?
Do I need any special equipment to make peanut clusters?
Can I make these peanut clusters for holiday gifting?
Are there any variations I can try with this basic recipe?
Leave a review :
There are no reviews yet. Be the first one to write one.